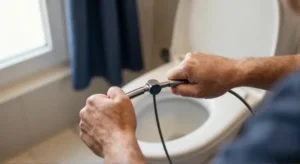
Few household problems cause as much stress as a toilet that refuses to flush. You have tried the plunger, waited for the water level to drop, and still the bowl fills up without draining properly. Before you reach for a chemical drain cleaner, consider a more effective and porcelain-safe tool, the toilet auger. Also called a closet auger, this device is specifically designed to break through or retrieve the stubborn clogs that a plunger cannot handle. Learning how to use toilet auger correctly can save you the cost of a plumber and prevent costly damage to your toilet.
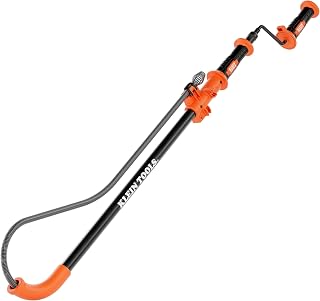
Klein Tools 53018 6-Foot Steel Toilet Auger
Check PriceWhat Is a Toilet Auger and When Should You Use It?
A toilet auger is a manual drain-clearing tool with a long, flexible cable inside a protective metal tube. The tube has a bend at the bottom to navigate the toilet’s built-in trap. At the end of the cable, a crank handle lets you rotate the tip, which is usually a coiled spring or a hook. This design allows you to push through a blockage or snag a solid object, like a child’s toy or a thick wad of toilet paper, without scratching the porcelain.
You should use a toilet auger when a plunger fails to clear a clog after several attempts. If the toilet flushes weakly, the water drains slowly, or the bowl almost overflows and then recedes very slowly, the blockage is likely deeper in the trap or just beyond it. A toilet auger is the safe, intermediate step before calling a professional. It is much gentler on your toilet than a standard drain snake, which can chip the bowl.
Many people confuse a toilet auger with a regular drain snake. The two tools serve different purposes. A toilet auger has a shorter, kink-resistant cable housed in a rigid, curved tube that protects the bowl. A drain snake is longer and better suited for shower or sink drains. If you are unsure which tool fits your situation, our article on choosing the right tool for the job explains the differences in detail.
How to Use Toilet Auger: Step-by-Step Guide
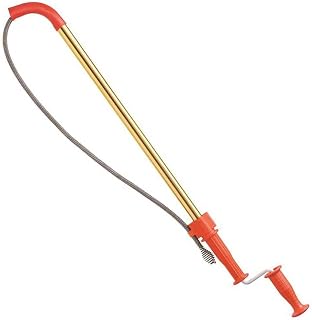
RIDGID 59802 K-6DH Hybrid Toilet Auger
Check PriceUsing a toilet auger is straightforward once you understand the motion. The key is to be patient and gentle, never forcing the cable. Here is the complete process, broken down into clear stages.
1. Gather Your Supplies and Prepare the Area
Start by putting on a pair of rubber gloves. You will be working with dirty water, and the cable will come into contact with the clog. Lay down old towels or rags around the base of the toilet to catch any accidental drips. Make sure the bathroom is well ventilated. Keep a bucket nearby to place the auger after you finish, as it will be wet.
If the water level is dangerously high and threatening to spill over, scoop out some water into the bucket with a small cup. You want the water level low enough that you can lower the auger without splashing, but you still need enough water in the bowl to help flush the debris after you break the clog.
2. Position the Auger Correctly
Hold the auger with the curved, rubber-coated end facing down toward the drain opening. The rubber sleeve on the bend is designed to protect the porcelain from scratches. Professional plumbers often recommend keeping the tool as vertical as possible when you start. Insert the curved end into the bottom of the toilet bowl, centering it in the drain hole until the rubber guard rests gently against the porcelain.
3. Feed the Cable Down the Drain
With one hand on the handle and the other on the metal tube, begin pushing the cable down into the drain. The cable will slide out of the tube as you apply gentle downward pressure. You will feel the cable follow the natural curve of the toilet’s internal trap. Do not twist the handle yet, simply feed the cable in until you feel resistance. That resistance is the clog.
If you cannot push the cable any further, do not force it. Pull the cable back an inch or two and then proceed to the next step. Forcing the cable can cause it to kink inside the bowl or scrape the trapway. A kinked cable is difficult to retract and may require removing the toilet to get it out.
4. Rotate the Handle to Break the Clog
Once you have firmly seated the auger tip against the obstruction, lock the cable in place by tightening the thumb screw if your model has one. Then, start turning the crank handle clockwise. Keep a steady, consistent rotation while applying light forward pressure. The spinning motion allows the coiled spring tip to drill into the clog, break it apart, or hook onto the material.
You might feel the resistance suddenly give way. That is a good sign, it means the clog has broken up. If the clog is a solid object, like a comb or a small toy, the auger tip may grab it. In that case, you will feel a firm, unmistakable catch. Stop rotating immediately and prepare to retrieve the object, pulling it back slowly rather than trying to push it further down the drain.
5. Retrieve the Cable Carefully
After you have worked the auger for a minute or two, it is time to pull the cable back. Loosen the thumb screw if you tightened it, and slowly pull the cable up and out of the drain. As you retract, some debris may cling to the tip. Wipe the tip with a disposable rag and drop the debris into the bucket. Do not rinse the cable in the toilet water, as you might dislodge the clog back into the bowl.
If you met an obstruction and the auger did not break it completely, you can reinsert the cable and repeat the rotating and retracting process. Sometimes a tough clog requires three or four attempts. Patience is essential. If the auger comes out clean and the water still drains slowly, the blockage may be further down the waste line, beyond the toilet’s trap, and you might need a different approach.
6. Flush and Test the Toilet
Once you believe the clog is cleared, pour a bucket of clean water into the bowl from waist height. The force of the water mimics a flush and helps you see if the drain is accepting water. If the water swirls and drops quickly, you have succeeded. Now flush the toilet normally. Watch the water level and listen for a smooth, complete flush. If the bowl still fills up and drains slowly, you may need to auger again or consider that the problem is a partial blockage deeper in the main drain.
Tips to Avoid Scratches and Damage
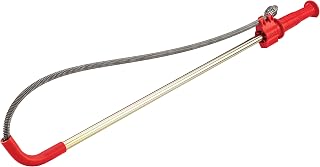
RIDGID 59787 K-3 Toilet Auger
Check PriceOne of the biggest fears when using any tool inside a toilet is scratching the porcelain. A single scratch can become a permanent stain catchment area. Always keep the rubber guard in contact with the bowl. Avoid letting the bare metal tube hit the rim. If your auger’s rubber sleeve is worn or missing, replace it before using the tool. A simple piece of electrical tape can serve as a temporary protector, but a proper sleeve is cheap and worth it.
Never use a standard drain snake with a bare metal cable inside a toilet. The elongated, flexible cable whips around and can easily chip the porcelain at the trap entrance. A purpose-built toilet auger has a much shorter, rigid tube that controls the cable’s movement. If you are still putting together your home toolbox, our guide to picking the best auger for home use will help you choose a model with a durable protective sleeve and a comfortable crank handle.
Common Mistakes to Avoid
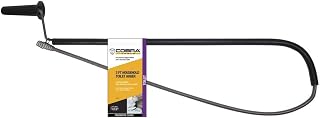
Cobra Products 40030 3-Foot Home Toilet Auger
Check Price- Using too much force. Jamming the cable forward can push the clog deeper or kink the cable. Let the rotation do the work.
- Spinning the handle counterclockwise. Always rotate clockwise. Counterclockwise rotation can unscrew the tip or loosen the cable inside the tube.
- Neglecting to trim a frayed cable. A damaged cable end can scratch the trap or snap off. Inspect the cable before each use and tighten any loose tip.
- Relying on the auger for every slow drain. If you have recurring clogs, the issue may be a blocked vent pipe or a sagging sewer line. An auger fixes the symptom, not the underlying cause.
- Forgetting to clean the tool. After use, rinse the cable with a hose outside, not in the sink. Spray it with a disinfectant and let it dry completely before storing to prevent rust and bacterial growth.
When to Call a Professional
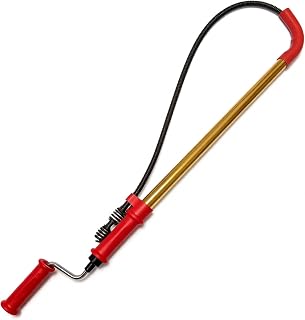
56658 K-6P 6FT Telescopic Toilet Auger
Check PriceA toilet auger handles most clogs within the toilet itself, but it cannot reach blockages deep in the main sewer line. If you have cleared the toilet trap multiple times and the problem returns within days, you likely have a more serious obstruction downstream. Other signs include gurgling sounds from other drains when you flush, water backing up into the shower, or a foul odor coming from multiple fixtures. In these situations, a plumber with a sewer auger or inspection camera is the safest and most effective solution.
Also, if you ever feel the auger cable bind and you cannot pull it back, stop immediately. Do not try to yank it free. The cable may have hooked onto a broken part of the toilet or become lodged in the drain. Forcing it can crack the toilet base. A professional can safely remove the toilet and free the auger without damaging the fixture.
Frequently Asked Questions About Using a Toilet Auger
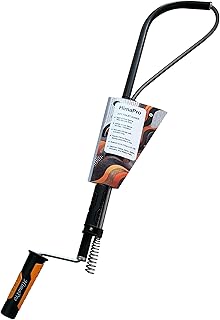
HimaPro Professional 3-Foot Toilet Auger
Check PriceCan a toilet auger scratch the bowl?
It can if used incorrectly. A quality auger has a rubber sleeve on the bend that protects the porcelain. Keep that sleeve positioned against the drain opening and never let the metal tube rub against the bowl. Slow, controlled movements prevent scratches.
How is a toilet auger different from a snake?
A toilet auger, or closet auger, has a rigid, curved tube and a short cable designed specifically for the toilet trap. A drain snake is a long, flexible cable used for sinks, tubs, and main lines. Using a snake in a toilet can easily chip the porcelain. If you need a visual comparison, you can read our detailed breakdown of toilet auger vs snake.
What if the auger goes in but the toilet still won’t flush?
If the auger passes through the trap without resistance but the water remains slow, the blockage could be beyond the toilet in the branch drain. You may need a longer snake or a professional inspection. Also, check that the toilet’s rim jets are not clogged with mineral buildup, which can weaken the flush.
How do I store a toilet auger after use?
Clean the cable thoroughly with a hose and mild disinfectant. Dry it completely with a rag to prevent rust. Retract the cable fully into the tube and hang the auger on a wall hook in a dry area. Avoid storing it on the floor where it can collect moisture.
Can I use a toilet auger on a low-flow toilet?
Yes. The process is the same. Low-flow toilets often have a smaller trapway, so you may need to work the cable more gently. The rubber guard still fits the drain opening. If you have a dual-flush toilet, ensure the auger tip does not catch on the flush mechanism inside the tank, but the auger only goes into the bowl, so no risk there.
Conclusion
Knowing how to use toilet auger turns a panic-inducing clog into a manageable DIY fix. The tool is simple, safe, and far more effective than a plunger for solid obstructions. The most important takeaways are to protect the bowl with the rubber sleeve, feed the cable steadily, rotate clockwise, and never force the tool. A little patience, combined with the right technique, will clear most common toilet clogs in under ten minutes.
Keep a quality toilet auger in your bathroom toolkit, alongside a good plunger. Once you have cleared a stubborn clog yourself, you will gain confidence and save money. For more guidance on building your home plumbing kit, check out our recommendations for the best toilet auger for home use and learn how to handle other common toilet issues without calling a plumber.