Why Does My Toilet Randomly Run for a Few Seconds? (A 2025 Guide to Fixing Phantom Flushing)
It’s the middle of the night. All is quiet. Then, you hear it—the unmistakable sound of your toilet briefly refilling its tank, as if a ghost just used the bathroom. This baffling and slightly creepy event, known to plumbers as “phantom flushing,” is more than just a noisy nuisance. It’s the audible symptom of a silent, continuous leak that can waste thousands of gallons of water per year, driving up your utility bills. The good news is that this is one of the most common and easiest-to-fix plumbing problems. This guide will turn you into a toilet detective, helping you pinpoint the cause and fix it for good.
Why Trust This Diagnostic Guide?
- Master Plumber Insights: We’ve consulted with certified master plumbers to ensure our diagnostic steps and repair advice align with professional best practices. We’re giving you the exact process a pro would use.
- Hands-On DIY Experience: Our team has personally diagnosed and repaired this exact issue in our own homes multiple times. We know the common mistakes and the simple tricks that make the job easier.
- In-Depth Mechanical Analysis: We don’t just tell you what to replace; we explain *why* the parts fail. Understanding the mechanics of your toilet tank empowers you to make a permanent fix.
- Unbiased, Data-Driven Recommendations: The products recommended are chosen based on their material quality (like chlorine resistance), thousands of positive user reviews, and their reputation among plumbing professionals—not on brand sponsorship.
The #1 Culprit: A Worn-Out or Faulty Toilet Flapper
Let’s be direct: in at least 90% of phantom flushing cases, the problem is a bad toilet flapper. The flapper is the rubber (or silicone) seal at the bottom of your tank that holds the water in until you flush. For your toilet to be silent, this seal must be absolutely perfect. Even a tiny, invisible imperfection will allow water to silently trickle from the tank into the bowl. Over several minutes or hours, the water level in the tank drops low enough to trigger the fill valve to kick on and refill it. That’s the sound you hear.
There are three main ways this crucial seal can fail:
1. Material Degradation
The most common issue is simple old age. The rubber of the flapper is constantly submerged in water, which in most U.S. municipalities is treated with chlorine. Over years, the chlorine eats away at the rubber, causing it to become brittle, warped, or blistered. A warped flapper can no longer sit perfectly flat on the flush valve seat, creating microscopic gaps for water to seep through.
2. Debris or Biofilm Buildup
Sometimes the flapper itself is fine, but the surface it seals against isn’t. Mineral deposits from hard water or a slimy layer of biofilm can build up on the plastic flush valve seat. This rough, uneven surface prevents the smooth rubber flapper from creating a watertight seal, leading to a slow leak.
3. Incorrect Flapper Chain Length
This is a surprisingly common and frustrating cause, especially after a new flapper has been installed. The chain connecting the flapper to the toilet handle must be the perfect length.
- Too Tight: If the chain has no slack, it will hold the flapper up slightly, preventing it from ever sealing completely.
- Too Loose: If the chain is too long, the excess length can fall onto the flush valve seat and get caught under the flapper, creating a gap.
The Ultimate Diagnostic: The Toilet Dye Test
Stop guessing and prove the leak is real with this foolproof, 2-minute test that plumbers use every day.
- Remove the tank lid. Set it aside carefully.
- Add color to the tank. Drop 5-10 drops of dark food coloring (blue or green) or a dye tablet into the tank water. Do NOT flush.
- Wait 15-20 minutes. Don’t use the toilet during this time.
- Check the bowl. Look into the toilet bowl. If you see any colored water in the bowl, you have 100% confirmed a leak from the tank to the bowl. The problem is your flapper or the flush valve seat. If the water is still clear, the problem is likely not a flapper leak.
The Solution: Choosing the Right Flapper
Once you’ve confirmed a leak with the dye test, the solution is simple: replace the flapper. It’s a $5-$15 part that takes less than 5 minutes to install. For a deep dive into all the options, see our complete guide to the best toilet flappers. For most situations, we recommend a universal, chlorine-resistant model.
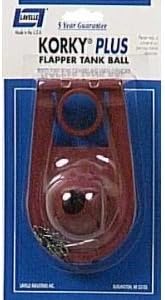
Recommended Fix: Korky Plus 2-Inch Universal Flapper
The Plumber’s Choice for a Permanent Fix
Check Price on AmazonThe Korky Plus is a favorite among professionals for its simple design and superior materials. It’s made in the USA from a proprietary Chlorazone rubber that is highly resistant to chlorine, bacteria, and hard water, meaning it will last significantly longer than a generic hardware store flapper. The red rubber is also more buoyant, ensuring it stays up long enough for a full, powerful flush. Its flexible design allows it to fit virtually any 2-inch flush valve, including those on popular Kohler and American Standard models.
Pros
- Made from durable, chlorine-resistant rubber
- Universal design fits most 2-inch flush valves
- Made in the USA with a 5-year warranty
- Easy, tool-free installation
- Trusted by plumbing professionals
Cons
- Slightly more expensive than basic flappers
- Will not fit modern 3-inch flush valves
Beyond the Flapper: Other (Less Common) Causes
If the dye test was negative but your toilet still runs randomly, the issue is more likely related to the fill valve. Here’s what to check.
Fill Valve Water Level is Too High
Look inside your tank. The water level should always be about 1 inch BELOW the top of the open overflow tube in the center. If the water level is at or above the top of this tube, water will constantly trickle down it into the bowl. This is not a leak, but an overflow problem caused by a misadjusted fill valve. You can lower the water level by adjusting the float on your fill valve (most have a small screw or clip to adjust the float height).
A Leaking Fill Valve Shank Washer
The fill valve is sealed to the tank by a rubber washer on the underside of the tank. If this washer is old and cracked, it can cause a very slow leak out of the tank itself, which would also cause the water level to drop and trigger a refill. This is much less common, but worth checking for if you see any moisture on the floor beneath the supply line connection.
The Proactive Solution: The Complete Rebuild Kit
If your toilet is over 10 years old and the flapper has failed, it’s a safe bet that the fill valve and gaskets are not far behind. Instead of fixing problems as they arise, the smartest, most cost-effective solution is a complete tank rebuild kit. For around $25-$35, a kit like the Fluidmaster 400AKR All-in-One Kit replaces every single moving part in your tank. It’s one project that guarantees your toilet will be problem-free for another decade.
Your 5-Minute Fix: How to Replace a Toilet Flapper
Ready to silence that phantom flush? Here’s how easy it is.
- Turn Off the Water. Turn the oval-shaped knob on the wall behind the toilet clockwise until it stops.
- Drain the Tank. Flush the toilet and hold the handle down to let out as much water as possible.
- Remove the Old Flapper. Unhook the flapper’s chain from the flush handle lever. Then, gently pop the two rubber “ears” of the flapper off the pegs at the base of the overflow tube.
- Clean the Flush Valve Seat. Before installing the new flapper, take a non-abrasive sponge or cloth and wipe down the plastic ring (the flush valve seat) that the flapper rests on. This removes any grime or mineral buildup and ensures a perfect seal.
- Install the New Flapper. Pop the ears of the new flapper onto the pegs. Connect the new chain to the flush handle lever.
- Set the Chain Length. This is the most important step! Adjust the clip on the chain so there is only about 1/2 inch of slack. Cut off any excess chain so it can’t get caught.
- Turn On the Water and Test. Slowly turn the water supply back on. Let the tank fill. Wait 20-30 minutes and listen. The phantom flush should be gone for good!
Frequently Asked Questions (FAQ)
How much water does a phantom flushing toilet really waste?
It’s shocking. A slow, silent leak can waste up to 200 gallons of water per day. That’s over 6,000 gallons a month! Depending on your local water rates, a single leaky toilet could be costing you $30, $50, or even $100 extra on your water bill every single month. A $10 flapper can save you hundreds of dollars a year.
Is it okay to just jiggle the handle to stop the toilet from running?
Jiggling the handle often works because it re-seats a warped or misaligned flapper. However, it’s a temporary fix for a permanent problem. The flapper is clearly not sealing properly on its own, and the leak will continue (and likely worsen) over time. It’s a clear signal that it’s time to replace the flapper.
Could a problem with my wax ring cause the toilet to run randomly?
No, these two issues are unrelated. The wax ring seals the toilet’s drain to the sewer pipe underneath, preventing water and sewer gas from leaking onto your floor. It has no connection to the water inside the tank. For more on this, see our guide on wax rings vs. rubber seals.
Conclusion: Banish the Phantom Flush for Good
A toilet that randomly runs is a clear cry for help. It’s telling you that a simple, inexpensive part has reached the end of its life. In the overwhelming majority of cases, that part is a worn-out toilet flapper. By using the foolproof dye test to confirm the leak and investing 5 minutes to install a new, high-quality flapper, you can solve this frustrating and costly problem yourself.
Don’t let that ghostly noise haunt your home and drain your wallet any longer. This is one of the easiest and most satisfying DIY repairs you can perform. You’ll not only save a significant amount of water and money but also gain the peace and quiet you deserve.