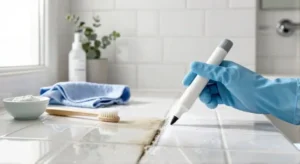
Learning how to whiten grout in bathroom is the secret to making your tiles look freshly installed without a expensive renovation. Over time, even the most beautiful tile work can become dull and neglected because grout lines soak up dirt, soap scum, and hard water minerals. This guide breaks down exactly how to bring that bright, clean look back, using methods that work on cementitious grout in showers, floors, and backsplashes. You will find gentle homemade solutions, effective oxygen bleach treatments, and safe commercial options, all explained step by step. No matter how dark or stained your grout has become, there is a method here that can restore it.
Bathroom grout whitening is not just about aesthetics. Discolored grout can harbor mold and mildew, leading to musty odors and potential health issues. By whitening and sealing your grout, you also create a surface that resists future staining. Whether you prefer natural cleaning pastes or ready-to-use sprays, the right technique makes a dramatic difference. Read on to understand why grout changes color, how to prep the area safely, and which whitening approach suits your bathroom best.
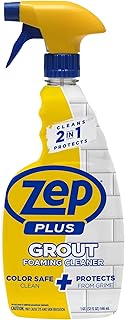
Zep Plus Grout Foaming Cleaner
Check PriceWhy Bathroom Grout Turns Dark
Grout is naturally porous, which means it absorbs moisture, body oils, soap residue, and tiny dirt particles every single day. In a humid bathroom, mold spores and mildew settle into those pores and grow, leaving behind dark gray or black stains. Hard water adds another challenge, as mineral deposits build up and turn white grout yellow or orange. If you have never sealed the grout, the porousness becomes a magnet for discoloration.
Common causes of grout darkening include using too much cleaning product that leaves a sticky residue, insufficient ventilation that traps moisture, and simply years of foot traffic on floor grout. Even the grout’s original color can change if a previous homeowner applied a colored sealer that has worn unevenly. Understanding these triggers helps you pick a whitening method that addresses the root issue, not just the surface stain.
In severe cases, grout may appear black because of deep-set mold. This is more than a cosmetic problem: mold can trigger allergies and respiratory irritation. Whitening methods that contain oxygen bleach or hydrogen peroxide not only brighten but also kill mold spores, giving you a healthier bathroom environment. However, you always want to confirm the grout is not damaged or crumbling before you begin any treatment.
Safety Precautions Before Whitening Grout
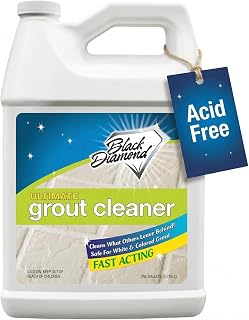
Black Diamond Ultimate Grout Cleaner
Check PriceBefore you tackle how to whiten grout in bathroom, take a few minutes to prepare the room and protect yourself. Most methods involve mild acids or oxygen bleach, which are generally safe but can irritate skin and eyes. Always wear rubber gloves and protective eyewear. Open a window or run the exhaust fan to improve ventilation, especially if you plan to use commercial cleaners or bleach solutions.
Test your chosen whitening paste or spray in an inconspicuous corner first. Apply a small amount, wait five minutes, then rinse and check that the grout color lightens without damaging the surrounding tile. Some natural stone tiles, like marble or travertine, can be etched by acidic ingredients such as vinegar or lemon juice. If you have delicate tiles, stick to pH-neutral oxygen bleach or grout-specific whiteners.
Keep children and pets away from the bathroom while you work. Never mix different cleaning agents, especially bleach and ammonia, because the combination produces toxic fumes. Also, avoid using wire brushes on soft or sanded grout, since aggressive scrubbing can scratch the tile glaze and erode the grout lines. A soft-bristle toothbrush or nylon grout brush is much gentler and equally effective.
How to Whiten Grout in Bathroom: Step-by-Step Methods

Qimedo Electric Spin Scrubber Q2, 4000mAh Battery, 1500RPM High Power
Check PriceYou do not need a professional to achieve dramatic results. The following five methods range from all-natural pastes to deep-cleaning oxygen bleach soaks and even the power of steam. Each technique is designed for different stain levels and tile types. Pick the one that matches your situation, and be patient, heavy buildup often requires a second application.
Method 1: Baking Soda and Hydrogen Peroxide Paste
This classic homemade paste can tackle mild to moderate discoloration on white and light-colored grout. Hydrogen peroxide is a natural bleaching agent that lifts stains gently, while baking soda provides a mild abrasive to scrub away surface dirt. It is safe for ceramic and porcelain tiles, and it does not produce harsh fumes, making it ideal for regular maintenance.
- Combine 1/2 cup baking soda with enough 3% hydrogen peroxide to form a thick, spreadable paste.
- Apply the paste directly onto the grout lines using an old toothbrush or a grout brush.
- Let the paste sit for 10 to 15 minutes, then scrub vigorously in a circular motion.
- Rinse with warm water and wipe dry with a microfiber cloth.
For stubborn stains, add a few drops of liquid dish soap to the paste. The soap helps break down oily residue, while the peroxide continues bleaching. If the grout still looks dull after one round, repeat the process and allow the paste to sit for up to 30 minutes. Always rinse thoroughly to remove all baking soda grit, which can attract dirt if left behind.
Method 2: Oxygen Bleach Soak
Oxygen bleach, often sold as sodium percarbonate powder, is a safer and color-safe alternative to chlorine bleach. It releases hydrogen peroxide when mixed with warm water, creating an oxygenated solution that penetrates deep into grout pores. This method is excellent for restoring heavily stained, dingy grout that has been discolored for years. According to a detailed guide from This Old House’s grout cleaning advice, oxygen bleach is one of the most effective grout whiteners without risking damage to adjacent surfaces.
- Dissolve 2 tablespoons of oxygen bleach powder in 1 cup of warm water. Stir until fully dissolved.
- Apply generously to the grout lines with a sponge or spray bottle.
- Let the solution work for 20 minutes, keeping the grout wet by misting with the spray bottle every 5 minutes.
- Scrub lightly with a nylon brush, then rinse with clean water and wipe dry.
For floor grout, you can mix a stronger batch and pour it over the entire area, letting it dwell for up to 30 minutes. Use a deck brush to agitate the solution and then mop up with fresh water. Oxygen bleach does not leave behind a toxic residue, so it is safe for homes with pets and children once rinsed. Regular monthly treatments with this method can keep grout bright without any harsh chemicals.
Method 3: Vinegar and Baking Soda Fizz
The combination of white vinegar and baking soda creates a fizzy reaction that loosens dirt and mineral deposits. Vinegar’s mild acidity helps dissolve hard water stains and soap scum, while the effervescence lifts debris out of the grout’s pores. This method works well on sealed grout and ceramic tiles, but avoid it on natural stone because the acid can etch the surface.
To use this technique, sprinkle dry baking soda directly onto the grout lines. Then, spray or drizzle white vinegar over the baking soda. You will see an immediate fizzing action. Let the mixture bubble for 5 to 10 minutes, then scrub with a toothbrush. Rinse with warm water and inspect the color. The mild abrasive action combined with the acidic breakdown often restores a bright white appearance in one treatment.
Although vinegar is eco-friendly and inexpensive, its acid can weaken grout over time if used excessively. Limit vinegar-based whitening to once a month at most, and always rinse thoroughly. If the grout feels gritty or sandy after cleaning, it may be time to consider resealing the lines to protect them from further damage.
Method 4: Commercial Grout Whitener
Sometimes the most efficient route is a purpose-made grout whitener or restorer. These products often contain a bonding whitening agent that not only cleans but also coats the grout with a bright, stain-resistant finish. They are available in pen applicators or small bottles with a brush tip, making precision work easy. If you prefer a ready-made solution, our review of top-rated tile and grout cleaners can help you choose a formula that balances potency and safety.
Apply a commercial whitener exactly as the label instructs. Most require you to clean and dry the grout first, then brush or roll the product onto the lines. The whitener dries to a hard finish that resists water and dirt. This method can last up to a year before needing a touch-up. It is particularly handy for bathroom floors that see daily use and for grout that has stubborn yellowing from hard water.
Keep in mind that these whitening coatings can peel if not applied to properly prepared grout. Take time to remove all soap residue and let the grout dry completely. If you accidentally get the product on tile, wipe it off immediately with a damp cloth before it dries. Consistent results require patience, but the transformation can be remarkable.
Method 5: Steam Cleaning

Waitbird 4.5 Bar Steam Cleaner for Home, Handheld Steamer
Check PriceSteam cleaning uses high-pressure, high-temperature steam to blast dirt out of grout pores without any chemicals at all. It is one of the most hygienic methods because the heat kills mold, bacteria, and dust mites on contact. If you already own a steam cleaner with a small detail nozzle, you can tackle grout whitening in minutes without scrubbing. Steam is safe for virtually all tile types, including sealed natural stone.
To steam clean grout, fill your machine with distilled water to prevent mineral buildup. Attach the grout brush or angled nozzle, and work slowly along each line, holding the steam trigger for a few seconds every few inches. As the steam loosens grime, wipe it away with a microfiber cloth. You may see the dirty water immediately, proving how effective steam penetration can be. For especially dingy grout, go over the area twice.
Steam cleaning does not whiten grout through bleaching, but by removing the physical stains that cause discoloration. If the grout is intrinsically gray due to old age or cement color change, steam alone may not turn it pure white. In those cases, pair steam cleaning with an oxygen bleach treatment for a true brightening effect.
Tools That Make Grout Whitening Easier
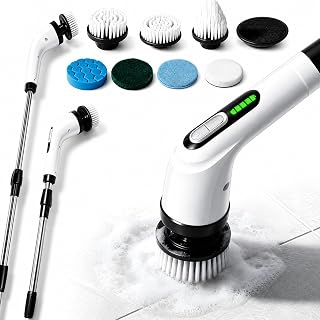
Highyes Electric Spin Scrubber for Bathroom
Check PriceWhile a toothbrush works in a pinch, a few specialized tools can speed up the process and improve your results. A stiff nylon grout brush with a narrow profile fits perfectly into grout lines and saves your knuckles. For floor applications, a long-handled grout scrub brush lets you work standing up, saving your back during larger projects. Electric spin scrubbers with interchangeable heads can turn an hour of scrubbing into 10 minutes of effortless cleaning.
Many homeowners also use a handheld steam cleaner with a grout attachment to cut through buildup without chemicals. Microfiber cloths are essential for wiping away dirty residue and drying the grout after rinsing. If you are applying a commercial whitener, a small foam brush gives you precise control. Investing in quality tools turns grout whitening from a dreaded chore into a quick weekend task.
Preventing Future Grout Discoloration
Once you have learned how to whiten grout in bathroom and achieved a fresh look, preserving that brightness is the next step. Applying a high-quality grout sealer is the single most effective preventive measure. Penetrating sealers soak into the grout pores and block moisture, soap scum, and dirt. You can apply sealer with a small brush or a roller applicator specifically designed for grout lines.
Most sealers need 24 to 48 hours to cure fully. During that time, keep the bathroom dry and avoid any cleaning products. After sealing, establish a weekly quick-clean routine. Squeegee shower walls after every use to minimize water spots and mildew. Wipe floors and countertops with a microfiber cloth weekly to pick up dirt before it settles into grout. Good ventilation, whether through a window or an exhaust fan, dramatically reduces moisture buildup that leads to mold.
For ongoing maintenance, use a pH-neutral daily cleaner rather than harsh acids or bleach-based sprays. A mild solution of warm water and a few drops of dish soap does an excellent job of preventing new stains. If you enjoy a deeper clean every month, a light application of oxygen bleach keeps grout looking new. With these habits, your grout can stay bright for years without aggressive whitening treatments.
Frequently Asked Questions about Whitening Grout
Can I use chlorine bleach to whiten bathroom grout?
Chlorine bleach will lighten grout, but it is harsh and can weaken the grout structure over time. It also emits strong fumes and can discolor nearby fabrics and metals. Oxygen bleach is a safer alternative that achieves similar whitening results without damaging the grout or posing significant health risks. If you must use chlorine bleach, dilute it properly, never mix it with other chemicals, and ventilate the room thoroughly.
Why does my grout turn yellow after cleaning?
Yellowing often results from waxy or soapy cleaning residues that build up on the grout surface. Hard water minerals can also leave a yellow tint. Try an oxygen bleach soak to remove embedded residues, and after cleaning, always rinse with clear water until no slicks remain. Switching to a residue-free cleaner and using a squeegee after showers can prevent yellowing from returning.
Is it safe to whiten grout on natural stone tiles?
It depends on the stone. Polished marble, travertine, and limestone are sensitive to acids, so avoid vinegar, lemon juice, or acidic commercial cleaners. Stick to oxygen bleach paste or steam cleaning, and always test a hidden area first. Many stone-safe grout whiteners are available, but verify with the product manufacturer that the formula is compatible with your specific stone type.
How often should I whiten my bathroom grout?
For most bathrooms, a thorough whitening treatment every three to six months keeps grout looking fresh. High-traffic family bathrooms may require attention every two months. If you seal the grout after whitening and maintain good ventilation, you can extend the time between deep cleanings. Let the visual appearance be your guide, and address stains before they become deeply set.
Can I paint over stained grout instead of whitening it?
Grout paints and color sealers can cover stubborn stains, but they are not a permanent fix. These products often need reapplication after a year, and improper application results in peeling. It is usually best to whiten and seal the original grout first. If the grout is damaged or too deeply stained, regrouting might be a longer-lasting solution than painting.
Conclusion
Now that you know how to whiten grout in bathroom using safe, effective methods, the path to a brighter, fresher bath is clear. Start with a gentle baking soda and peroxide paste for routine maintenance, then move to oxygen bleach or steam for deeper stains. A commercial whitener can lock in results and extend the time between cleanings. Whichever approach you choose, always prioritize safety, test products first, and seal the grout afterwards to keep dirt and moisture out.
Consistent care matters more than aggressive chemical treatments. Incorporate a quick daily wipe and weekly ventilation into your routine, and your grout lines will stay clean and bright for the long haul. For more tips on maintaining sparkling tiles, our guide to cleaning bathroom wall tiles correctly walks you through the entire wall-care process. With a little effort and the right strategy, you can have grout that looks as good as the day it was installed.