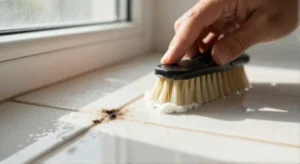
Standing in your shower and staring at grimy, discolored grout lines is enough to make anyone feel like their bathroom will never look truly clean again. Grout is porous, which means it soaks up soap scum, body oils, hard water minerals, and mildew like a sponge. Over time, that fresh, light-colored grout you once admired turns dark, dingy, and sometimes even speckled with black mold. Learning how to clean grout in bathroom tiles does not have to involve harsh chemicals, back-breaking scrubbing, or a total renovation. With the right supplies and a clear step-by-step plan, you can restore those lines to their original bright condition faster than you might think.
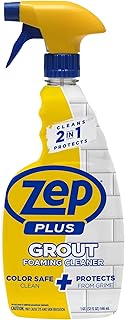
Zep Plus Grout Foaming Cleaner
Check PriceWhy Bathroom Grout Gets Dirty So Fast
Bathroom grout acts as a cement-based filler between tiles, and it is naturally more absorbent than the glazed surface of ceramic or porcelain. Every time you shower, tiny droplets of water carry shampoo residue, dead skin cells, and minerals into those microscopic pores. When the moisture evaporates, it leaves behind a sticky film that attracts dust and fosters mildew growth. In poorly ventilated bathrooms, the problem multiplies because the grout stays damp for hours, creating an ideal breeding ground for mold spores.
High humidity, splashing around the tub, and infrequent deep cleaning all team up to turn once-bright grout into a dark, splotchy mess. Even if you wipe down the tiles, neglecting the grout lines lets grime build up layer after layer. Understanding this process is the first step in realizing that regular maintenance matters just as much as a deep scrub session.
Essential Tools and Supplies for Grout Cleaning
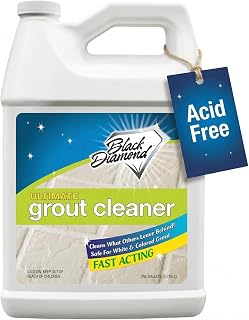
Black Diamond Ultimate Grout Cleaner
Check PriceBefore you start scrubbing, gather a few basic tools and cleaning agents. Having the right gear on hand cuts your work time in half and saves your wrists from unnecessary strain. You do not need a closet full of specialty products, but a few key items will make the job much easier.
- A stiff-bristled grout brush or an old toothbrush
- Baking soda
- Distilled white vinegar
- Hydrogen peroxide (3% solution)
- Oxygen bleach powder (sodium percarbonate)
- Spray bottle
- Microfiber cloths or sponges
- A handheld steam cleaner (optional)
- Rubber gloves and protective eyewear
- A small bowl for mixing pastes
If you prefer ready-made solutions, you can also turn to a top-rated grout cleaner that is formulated specifically for tile joints. Our collection of high-performance tile and grout cleaners covers sprays, foams, and gels that tackle stubborn buildup without endless scrubbing.
How to Clean Grout in Bathroom: Step-by-Step Methods That Work

Qimedo Electric Spin Scrubber Q2, 4000mAh Battery, 1500RPM High Power
Check PriceThere is no single magic bullet, but several reliable techniques can lift years of discoloration. Start with the gentlest method and work your way up to stronger solutions only if needed. Always test any cleaning paste or liquid on a small, hidden section of grout to make sure it does not cause etching or fading.
Method 1: Baking Soda and Vinegar Paste
This classic duo delivers a fizzy reaction that helps break down grime and light stains. It is one of the safest approaches, especially if you want to avoid bleach fumes in a small bathroom. The mild abrasive nature of baking soda gently scours without scratching the grout.
- Mix three parts baking soda with one part water in a bowl to form a thick, spreadable paste.
- Using your brush or an old toothbrush, apply the paste directly onto the grout lines, working it into the crevices.
- Fill a spray bottle with undiluted white vinegar and spritz it generously over the baking soda-coated grout. You will see bubbling action right away.
- Let the mixture fizz and sit for five to ten minutes, then scrub vigorously with the brush.
- Rinse the area with warm water and wipe dry with a microfiber cloth to prevent water spots.
For corners or areas with heavy soap scum, a second application often removes the remaining residue. This method works best for surface-level dirt and minor staining, not for deeply set, years-old discoloration.
Method 2: Hydrogen Peroxide and Baking Soda for Deeper Stains
When vinegar feels too mild, hydrogen peroxide steps in as a powerful oxidizer that lifts stubborn organic stains and kills mold spores without the harshness of chlorine bleach. Combined with baking soda, it creates an oxygen-rich paste that penetrates porous grout.
- Make a paste using enough hydrogen peroxide to moisten half a cup of baking soda until it resembles thick pancake batter.
- Apply the paste generously along the grout lines with your brush.
- Allow the mixture to sit for 15 to 20 minutes. Longer contact time gives the peroxide a chance to break down embedded dirt.
- Scrub in a circular motion, adding a splash of fresh hydrogen peroxide if the paste starts to dry out.
- Rinse thoroughly with cool water and buff dry.
Peroxide-based pastes are particularly effective on pink mold, mildew stains, and light yellowing. Avoid mixing peroxide with vinegar or bleach inside the same cleaning session, as that can create harmful fumes.
Method 3: Oxygen Bleach for a Whole-Room Refresh
Oxygen bleach, often sold as a powder, activates when mixed with warm water and releases oxygen bubbles that lift dirt out of grout pores. Unlike chlorine bleach, it is color-safe and does not give off harsh fumes. According to Bob Vila’s grout cleaning recommendations, oxygen bleach is one of the most reliable options for brightening grout without damaging surrounding tile.
- Dissolve oxygen bleach powder in warm water following the product instructions. For heavy staining, use a slightly stronger concentration.
- Apply the solution directly to the grout lines using a sponge or spray bottle, and let it sit for at least 15 minutes, or up to 30 minutes for stubborn areas.
- Scrub briskly with a stiff brush, then rinse with plenty of clean water.
- Wipe the tiles with a damp cloth to remove any powdery residue.
This method works wonders on large bathroom floors, shower walls, and even on colored grout. Oxygen bleach is also excellent as a preventative soaker, you can apply a diluted version once a month to slow down new buildup.
Method 4: Steam Cleaning for a Chemical-Free Deep Clean
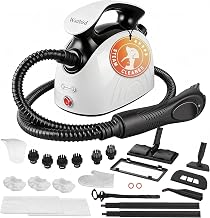
Waitbird 4.5 Bar Steam Cleaner for Home, Handheld Steamer
Check PriceIf you want to avoid cleaning agents altogether, a handheld steam cleaner uses high-temperature vapor to blast dirt, grease, and bacteria out of grout pores. The heat alone kills mold and loosens grime, and the pressure rinses it away without any scrubbing.
- Fill your steam cleaner with distilled water to prevent mineral buildup inside the machine.
- Attach a small brush nozzle, and work slowly along each grout line, allowing the steam to penetrate for a few seconds before moving on.
- Wipe away loosened grime immediately with a microfiber cloth.
- Repeat in spots where the discoloration persists.
Steam cleaning is gentle enough for regular use and leaves zero chemical residue, making it a favorite for households with kids or pets. Many people find that a weekly steam session keeps bathroom grout looking as good as new without any extra effort. If you are curious about adding steam to your routine, take a look at our guide on how steam cleaning handles shower surfaces.
Method 5: Commercial Grout Cleaners and Gels
Sometimes you want a product that clings to vertical surfaces, does the heavy lifting while you grab a coffee, and rinses clean with minimal scrubbing. Gel-based grout cleaners and foaming sprays are designed to hang onto tile joints longer than liquid mixes. Look for formulas labeled as grout-specific rather than general bathroom sprays, because they contain surfactants and mild acids that target the mineral and soap scum bond.
Always follow the label directions precisely. Most require you to apply the gel, wait five to ten minutes, agitate with a brush, then rinse. If you are dealing with black mold on shower grout, a cleaner containing a mildewcide can stop regrowth for weeks longer than a homemade mix.
Preventing Future Grout Stains After You Clean
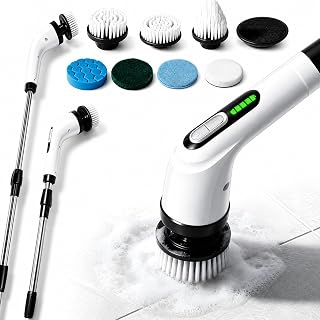
Highyes Electric Spin Scrubber for Bathroom
Check PriceOnce you have put in the work to make your grout sparkle, a few daily habits can keep it that way for months. The most effective prevention strategy is moisture control, dry grout cannot feed mold. Squeegee the shower walls and floor after the last person bathes, and leave the bathroom door or window open for at least 20 minutes.
- Run the exhaust fan during every shower and for 30 minutes afterward.
- Wipe down wet tiles and grout lines with a towel right after cleaning or showering.
- Apply a grout sealer once the grout is completely dry. A penetrating sealer blocks moisture and makes future cleaning much easier.
- Avoid oil-based soaps that leave heavy residue, liquid body washes and bar soaps with glycerin are often gentler on grout.
Sealing is the single best long-term investment. You can test whether your grout needs sealing by sprinkling a few drops of water on it. If the water beads up, the seal is still working; if it absorbs quickly and darkens the grout, it is time to reseal. Reapply a quality grout sealer once a year in a typical family bathroom.
How to Whiten Grout That Stays Dingy No Matter What You Do
Sometimes you follow every step, yet the grout still looks gray or yellowish. In those cases, the color change may be trapped deeply inside the porous material rather than sitting on the surface. Before you consider chiseling out and regrouting, there are a few last-resort tricks that often restore brightness.
- Make a thick paste of baking soda and hydrogen peroxide, apply it, cover with plastic wrap, and let it sit overnight. The extended dwell time draws out deep stains.
- Use a grout whitening pen specifically made for tile joints. These paint-like products coat the grout line and give it a clean, uniform finish.
- If you have only a few discolored spots, apply a diluted oxygen bleach gel, cover it with a strip of paper towel, and mist it every hour for a day. This poultice effect pulls embedded grime to the surface.
For a full walkthrough of these advanced techniques, head over to our in-depth article on how to restore grout to its original brightness. It covers poultice recipes, whitening pens, and pro-grade sealing steps that make the results last.
Common Grout Cleaning Mistakes to Avoid
Even with the best intentions, some cleaning habits can make grout problems worse over time. Knowing what to skip saves your grout from premature cracking or permanent discoloration.
- Avoid using chlorine bleach repeatedly on white grout. It can yellow the grout over time and weaken the cement structure.
- Do not scrub grout with metal brushes or steel wool, they scratch the surface and create tiny grooves that trap more dirt.
- Never mix ammonia and bleach, the fumes are toxic. Always use one product at a time and rinse thoroughly before switching.
- Skipping the rinse step leaves cleaning residues that attract soap scum faster than before.
- Sealing damp grout locks moisture in, leading to mold blooming beneath the sealer. Allow grout to dry for a full 24 hours before applying any sealer.
Frequently Asked Questions About Cleaning Bathroom Grout
Can I use a power scrubber on bathroom grout?
Yes, a cordless electric spin scrubber with a medium-stiff brush attachment makes quick work of large grout areas. It reduces hand fatigue and provides consistent pressure. Just avoid abrasive pads that can scour the grout surface.
How often should I deep clean bathroom grout?
For a bathroom used daily, aim for a thorough cleaning every two to four weeks, depending on ventilation and water hardness. A monthly deep clean prevents heavy buildup that requires hours of scrubbing later.
Is it safe to use CLR or other acidic cleaners on grout?
Acidic cleaners like CLR can dissolve mineral deposits, but they also etch cement-based grout if left on too long. If you use them, follow the label timing precisely, rinse with plenty of water, and never apply them to unsealed grout.
What is the fastest way to clean grout without scrubbing?
Steam cleaning is the fastest no-scrub method. The high-temperature vapor pushes out dirt while you simply guide the nozzle. A strong oxygen bleach soak also reduces scrubbing to a minimum, just letting the solution sit does most of the heavy lifting.
Does sealing grout really make a difference?
Absolutely. A quality penetrating sealer fills the microscopic pores and repels water, soap, and oils. Sealed grout stays brighter longer and cleans up with a quick wipe instead of a deep-scrub session.
Putting It All Together for a Brighter Bathroom
Cleaning grout does not have to be a dreaded weekend project. By starting with a gentle baking soda and vinegar paste, moving up to hydrogen peroxide or oxygen bleach as needed, and finishing with a steam session, you can tailor the method to your bathroom’s specific stains. Consistency matters more than brute force. A quick weekly wipe-down, a monthly deep clean, and an annual reseal keep those lines looking clean and fresh all year round.
The next time you notice dark spots creeping into the corners of your shower, you will know exactly how to clean grout in bathroom tiles and make them sparkle again. Pick the method that fits your time and comfort level, gather your supplies, and give your bathroom the refresh it deserves. You will be amazed at how much brighter the entire room feels with clean, even grout lines.