A wobbly toilet seat is one of those small annoyances that can make a bathroom feel neglected. Every time you sit down, that slight shift reminds you something is not right. The good news is learning how to fix a loose toilet seat takes only a few minutes and requires minimal tools. You do not need to call a plumber or buy an expensive replacement, often a simple tightening does the job.
This guide walks you through the complete process, from diagnosing the cause to tightening hidden fixings. You will learn step-by-step methods for standard top-mount seats, bottom-mount designs, and modern quick-release systems. By the end, your toilet seat will stay firmly in place, and you will have the confidence to handle this basic home repair yourself.

Mayfair Cassel Slow Close Round Toilet Seat
Check PriceWhy Does a Toilet Seat Become Loose?
A toilet seat endures daily movement and weight shifts. Over time, the mounting hardware simply works itself free. Understanding why it happens helps you prevent the issue from returning right after a fix. Most loose seats trace back to three or four common culprits.
Common Causes of a Wobbly Seat
- Loose mounting bolts due to repeated sitting and shifting
- Worn plastic bushings that no longer grip the bolt threads
- Cracked plastic hinges from over-tightening or age
- Improper initial installation where the nut was never fully seated
- Bathroom humidity causing expansion and contraction of nylon parts
Often you can see the plastic caps at the back of the seat shift slightly when you nudge it. That is a clear sign the bolts underneath have backed out. Even metal bolts can loosen if the rubber washers lose their grip against the ceramic.
Tools and Materials You Will Need
Before you kneel beside the toilet, gather a small set of tools. Most households already have these items in a basic toolkit. Being prepared saves time and prevents frustration halfway through the job.
- Flathead screwdriver (for prying plastic caps)
- Phillips screwdriver (if the bolts have a cross-head top)
- Adjustable wrench or deep-well socket
- Needle-nose pliers or locking pliers
- Penetrating oil (if bolts are corroded)
- Replacement bolts and nuts kit (optional but handy)
- Rubber gloves and a small towel
Having a universal toilet seat bolt kit on standby is smart. These kits include rust-resistant bolts, wing nuts, and fresh plastic bushings that can solve most stubborn looseness permanently. For more detailed visual steps, Family Handyman’s toilet repair tips offer a helpful supplement.
How to Fix a Loose Toilet Seat: Step-by-Step
KOHLER Brevia Slow Close Elongated Toilet Seat
Check PriceThe exact approach depends on your seat’s mounting style. You will encounter top-mount bolts with visible caps, bottom-mount nuts accessible from under the bowl, or quick-release plates that hide everything. Read through each section and pick the one that matches your toilet.
Identifying Your Toilet Seat Type
Look at the back of the seat hinge. If you see round or rectangular plastic covers, you have a standard top-mount seat. If no caps are visible and you can feel nuts underneath the porcelain ledge, you have a bottom-mount seat. Seats with a button or slider release use a concealed mounting plate, this is the quick-release design.
Shine a flashlight between the tank and bowl to spot wing nuts or metal nuts. Knowing the style ahead of time prevents you from prying off something you should not touch.
Tightening Standard Top-Mount Bolts
This is the most common scenario and the easiest fix. The plastic caps cover the bolt heads, keeping moisture away and hiding the hardware. Follow these steps carefully.
- Open the toilet lid and locate the two hinge caps at the rear.
- Insert a flathead screwdriver under the seam of each cap and gently pop it up. Work slowly to avoid cracking the plastic.
- Once the caps are off, you will see a screw, a bolt head, or a threaded post. Some have a Phillips head, others accept a flathead or hex key.
- Hold the nut underneath the toilet with your fingers or pliers. This nut is often a plastic wing nut shaped for hand-tightening.
- Turn the top screw clockwise while keeping the bottom nut steady. Tighten until the hinge no longer shifts when you wiggle the seat.
- Do not overtighten. Porcelain can crack if you force the bolt too hard. Snug plus a quarter turn is usually enough.
- Replace the plastic caps by pressing them firmly until they click.
Test the seat by sitting on it and shifting your weight. If it still wobbles, the plastic bushing inside the hinge may be worn, or the nut may be stripped. In that case, a bolt replacement kit is needed.
Tightening Bottom-Mount Bolts
Bemis 7300SLEC Slow Close Elongated Toilet Seat
Check PriceSome older toilets and many elongated models use bolts that go through the bowl from below. The nuts are tightened against the underside of the china. This repair requires a bit more contortion but remains simple.
- Kneel beside the toilet and use a flashlight to locate the nuts underneath the rear bowl rim.
- If the nuts are metal and corroded, apply a small amount of penetrating oil and wait five minutes.
- Use an adjustable wrench or a deep socket to turn the nut clockwise. If the bolt spins with the nut, grasp the bolt head from above with pliers.
- Tighten both sides evenly. Check the seat alignment as you go, you do not want the seat to end up crooked.
- Wipe away any excess oil and test the seat stability.
When the nut is a plastic wing nut, you can often turn it by hand. A pair of slip-joint pliers gives better grip without damaging the threads. If the bolt simply will not tighten, the threads have likely stripped and need replacing.
Fixing a Quick-Release or Soft-Close Seat
Modern toilets frequently feature a quick-release mechanism that lets you remove the entire seat for cleaning. The looseness often comes from the mounting plate that stays attached to the bowl.
- Press the release button(s) on the hinge and lift the seat off the bowl. Set it aside.
- Examine the two mounting posts still fixed to the toilet. Look for a central screw or an Allen key slot.
- Using a screwdriver or the included hex key, tighten each post. These posts often have a rubber compression sleeve that expands as you tighten, locking them in place.
- Reattach the seat by aligning the hinge slots with the posts and pressing until you hear a click.
- Check for any side-to-side movement. If the plate still moves, remove it, reposition the rubber gasket, and retighten.
Soft-close hinges can develop slack in the damping mechanism itself. If tightening the plate does not eliminate the wobble, the internal hinge damper may be worn. In that case, look at our guide on choosing a no-slam toilet seat for a quiet upgrade.
What If the Bolts Spin Freely?
A common frustration occurs when you turn the top screw and the entire bolt spins without tightening. This means the nut below is not holding, either because it is stripped or you cannot grip it. Try these fixes.
- Use locking pliers clamped tightly onto the bottom nut while you turn from above.
- If access is too tight, remove the toilet tank lid and reach behind with a box wrench.
- Insert a flat rubber band over the screw head for extra grip between the screwdriver and the slot, then try again.
- As a last resort, cut off the old nylon nut with a hacksaw blade or plastic nut splitter and replace the entire bolt assembly.
Replacement bolt kits cost under ten dollars and come with fresh plastic bushings that grip the porcelain securely. When you install new bolts, put a dab of silicone grease on the threads, this prevents corrosion and makes future tightening easier.
When to Replace the Seat or Hinge Bushings
Mayfair Linden Slow Close Elongated Toilet Seat
Check PriceSometimes tightening alone is not enough. If the plastic hinge body has a hairline crack, it will continue to flex and loosen no matter how tight the bolts are. Examine the hinge plastic under good light. Any white stress marks or visible cracks mean replacement is inevitable.
Worn bushing sleeves inside the hinge also cause persistent wobble. The bushing is the small ring that the bolt passes through. When it degrades, it creates a gap that allows movement. You can replace just the bushings on some models, but buying a complete seat is often more cost-effective. For more seat-related fixes, you might glance at our article on how to stop a toilet seat from slamming, which covers hinge tension adjustments.
Preventive Maintenance and Pro Tips
Once you have a rock-solid seat, a few simple habits keep it that way for years. Bathroom humidity and daily use will eventually loosen any fastener, but you can slow the process dramatically.
- Check the bolts every three months by giving the seat a gentle shake. Catching a slight wiggle early prevents stripped threads.
- Apply a tiny amount of blue threadlocker to the threads if the seat loosens repeatedly. This stops vibration-induced backing out but still allows removal with hand tools.
- Avoid lifting the seat by the side of the ring, use the lid or the center to reduce twisting forces on the hinges.
- Teach kids not to stand on the toilet seat. The extra lateral force can snap plastic hinges instantly.
- If you use harsh chemical cleaners, wipe the hinges dry afterward to prevent plastic degradation.
When installing a brand new seat, place the rubber or foam gasket snugly between the hinge and the bowl. This cushion absorbs micro-movements and protects the porcelain glaze. Many people skip this pad and then wonder why the seat starts rocking within weeks.
Comparing Plastic vs. Metal Mounting Hardware
Bath Royale Executive Series Elongated Toilet Seat
Check PriceToilet seats come with either plastic (nylon) bolts or metal bolts. Both work well, but each has different longevity and ease-of-use characteristics. The table below outlines the key differences to help you decide what to use if you are replacing hardware.
Nylon bolts won’t rust and are easier to hand-tighten, but they can strip if you are aggressive with a wrench. Stainless steel bolts offer superior clamping force and last indefinitely, yet they can seize if you forget to grease the threads. For most households, a high-quality nylon kit with brass inserts provides the best balance. Plated steel bolts should be avoided, they rust quickly in humid bathrooms and become impossible to remove later.
If you decide on metal bolts, always use a metal washer and a rubber washer together. The rubber protects the porcelain from direct metal contact. This small step prevents hairline cracks in the bowl, an expensive mistake many first-time DIYers make.
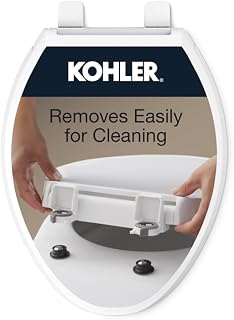
KOHLER Cachet ReadyLatch Elongated Toilet Seat
Check PriceFrequently Asked Questions
Why won’t my toilet seat stay tight after I fix it?
If the seat loosens again within days, you likely have a worn bushing or a stripped plastic nut. The threads cannot hold tension. Replace the entire bolt and bushing set, and avoid overtightening. Sometimes the hinge itself flexes, which means the seat has reached the end of its service life.
Can I use threadlocker on toilet seat bolts?
Yes, a medium-strength threadlocker (blue) is safe on nylon or metal threads. It prevents the nut from backing off due to vibration. Do not use red permanent threadlocker, because you might need to remove the bolts for cleaning or replacement later.
How often should I check toilet seat bolts?
Every three months is ideal. A quick wobble test takes two seconds. Catching slack early prevents bolt damage and keeps the seat from shifting and cracking the hinge.
Do I need to remove the toilet tank to access the bolts?
Rarely. Most bolts can be reached with a deep socket or an open wrench without removing anything. If your hand does not fit between the tank and bowl, a flexible shaft screwdriver or a small ratcheting box wrench does the job. Only in extremely tight installations would tank removal be necessary.
What if the plastic hinge caps will not pop off?
Slide the tip of a thin putty knife or a plastic trim tool under the edge. Avoid using excessive force with a metal screwdriver that could gouge the ceramic. If the cap seems stuck, sometimes a gentle push on the side of the cap while prying upward releases the internal clip more cleanly.
Conclusion
Fixing a loose toilet seat is a straightforward DIY task that restores comfort and silence to your bathroom. Whether you have standard top-mount bolts, bottom-mount nuts, or a quick-release mechanism, the process comes down to tightening a few fasteners with the right tool. The key is to avoid brute force, always protect the porcelain, and replace any worn hardware without delay.
Next time that familiar wiggle returns, you will know exactly what to reach for. Take five minutes, grab a screwdriver, and secure your seat. Regular checks and the simple preventive steps outlined here will keep the seat stable for the long haul. For other bathroom annoyances, browse our common toilet problems guide and tackle the next fix with confidence.