Mastering the Art of Steam Cleaning Your Bathroom
Keeping a bathroom spotless often feels like an endless chore filled with harsh chemicals and stubborn scrubbing. You might have tried every spray and foaming cleanser on the shelf, only to find grime creeping back into the grout lines. There is a faster, greener, and more satisfying way to achieve a truly deep clean. Using targeted steam cleaning bathroom tips transforms your routine from a chemical war zone into a simple, hygienic steam therapy session for your home.
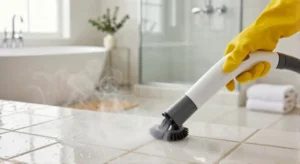
Steam cleaning is not just a marketing gimmick, it is a powerhouse method that uses high-temperature vapor to dissolve filth. It kills bacteria, dust mites, and mold on contact without leaving toxic residue behind. For beginners, a steam cleaner can seem intimidating, but mastering the technique is straightforward. Once you learn how the heat does the heavy lifting, you will never want to return to traditional scrubbing.
You do need to use the right approach to avoid water damage or smearing dirt around. Randomly blasting steam at a mirror will not get you far. Instead, a systematic approach ensures streak-free glass, sanitized fixtures, and fresh grout. By the time you finish reading these steam cleaning bathroom tips, you will have a clear roadmap for executing a pristine, hygienic washroom effortlessly.
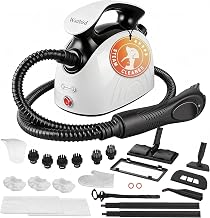
Waitbird 4.5 Bar Steam Cleaner for Home, Handheld Steamer
Check PriceWhy Steam Cleaning Outperforms Traditional Scrubbers
Most people rely on manual brushes and bleach-based solutions to clean bathrooms. While these methods work on surface dirt, they often push bacteria deeper into micro-crevices rather than destroying them. Steam reaches temperatures over 200 degrees Fahrenheit, which is lethal to most household pathogens. An electric scrubber vs steamer comparison reveals that scrubbing alone simply cannot sanitize at this molecular level.
Furthermore, steam eliminates the reliance on slippery detergents. Chemical cleaners can leave a sticky film that actually attracts more dust and soap scum later. Steam uses nothing but water vapor to break down sebum, body oils, and makeup residue. The result is a longer-lasting clean because there is no chemical leftover to act as a magnet for new dirt.
From a health perspective, steam wins decisively. Traditional aerosol sprays decrease indoor air quality and can trigger asthma. Steam cleaning traps allergens and kills mold spores, preventing them from becoming airborne. For families with children or pets who touch bathroom surfaces, a steam-sanitized floor provides peace of mind that bleach wipes often cannot.
Essential Equipment and Preparation Steps
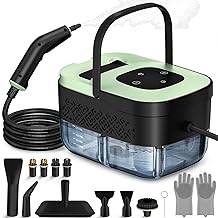
Steam Cleaner, Portable Steamer for Cleaning with 16pcs Accessories
Check PriceChoosing the Right Steamer for the Job
Your success hinges on selecting a machine that fits the size of your space. A large cylinder steamer with a water tank provides hours of use for floor tiles, while a handheld canister works perfectly for countertops and tight corners. Assessing the ideal model is crucial, and you can narrow down your options by researching the best bathroom steam cleaner that balances pressure and temperature controls.
Always look for models with continuous fill capabilities. If your tank runs dry mid-job, you want to refill without waiting 20 minutes for the boiler to cool down. Essential attachments make a massive difference. You need a large floor brush, a small nylon detail brush for grout, a squeegee for glass, and a pinpoint nozzle for faucets.
Do not underestimate the power of microfiber cloths. Clip a thick cloth over the brush head to absorb dissolved dirt immediately. Without the cloth, you risk simply blowing dirty water across the tile. Dry steam wrapped in a microfiber pad lifts soil rather than redistributing it.
Pre-Cleaning Surface Preparation
Never start with steam on a heavily soiled surface without dry dusting first. Loose hair, dust bunnies, and large crumbs must be vacuumed or swept away. If you hit a pile of dust with steam, it turns into wet mud that is harder to manage. A quick dry wipe ensures the steam targets the stuck-on grime rather than creating sludge.
Remove all loose items from counters, shower ledges, and the toilet tank lid. Clutter blocks your workflow and prevents you from hitting corners effectively. You want a blank canvas so you can move systematically around the room. Good preparation prevents you from wasting steam by maneuvering awkwardly around shampoo bottles.
Protect temperature-sensitive items. Although steam dissipates quickly, extreme heat can crack cold porcelain if applied too aggressively in one spot. Warm up the surfaces slightly by moving the steamer head around. Always test a small hidden area if you are cleaning delicate natural stone, as porous surfaces sometimes react poorly to intense heat and moisture.
High-Impact Steam Cleaning Bathroom Tips for Every Surface

10-in-1 Steam Mop, Detachable Handheld Steam Cleaner by LABIGO
Check PriceRestoring Dingy Grout Lines
Grout acts like a sponge for mildew and soap scum, making it the most satisfying place to use steam. Attach the small nylon brush nozzle and apply direct steam at the highest pressure setting. Move the brush slowly along the line, allowing the heat to melt the built-up waxes and oils. The discolored liquid will run down the tile if you angle the brush correctly.
For extreme mold staining, do not just rely on pressure. Hold the steam jet close to the grout for about four seconds before agitating. This thermal shock kills the root structure of the mold hiding deep inside the porous cement. Instead of just bleaching the surface color, you are eradicating the living organism causing the black spots.
Keep a dry rag in your other hand. Immediately wipe the liquefied dirt away, preventing it from settling back into the joints as it cools. If you forget to wipe, the residue hardens again. This two-handed “steam and swipe” technique is the secret used by professional house cleaners for achieving bright white grout without toxic fumes.
Achieving Streak-Free Glass Shower Doors
Soap scum on glass is a notorious eyesore, but steam turns it into a quick wipe-and-go job. Use the large squeegee attachment or wrap a flat microfiber bonnet over the steam plate. Start at the top of the door and move downward in overlapping stripes. The gravity-fed steam softens the hard water spots, while the fabric traps the filth.
If you notice streaking, you are likely using too much moisture without sufficient absorption. Switch to a thicker, dry microfiber cloth immediately. The steam should feel dry to the touch on the glass surface, just hot and slightly dewy. Following this, a light buff with a dry glass cloth will create an invisible, showroom-worthy finish.
Never use a metal scraping blade directly on the glass while steaming unless the manufacturer explicitly approves it. The thermal contrast can sometimes weaken seals or cause micro-scratches. Stick to fabric pads and gentle oscillating motions, letting the high heat do the physical scrubbing for you.
Sanitizing Sinks, Faucets, and Hard-to-Reach Crevices
Bathroom faucets are breeding grounds for toothpaste scum and hard water calcium. The pinpoint concentrator nozzle is your best tool here. Aim the thin jet of steam around the base of the handles and the drain plug. The pressure blows out hidden black mold and gunk that brushes cannot reach. Within seconds, you will see dirty water flowing out of seams you did not know existed.
For aerators and showerheads, steam loosens mineral blockages painlessly. Pass the steam directly into the nozzle holes without wiping right away. Wait thirty seconds for the calcium to dissolve thermally, then run hot tap water through the fixture. You get better water flow instantly, restoring your shower pressure without unscrewing any hardware.
Pay close attention to sink overflow holes. Those small openings near the rim collect black organic slime. Insert the pinpoint nozzle and blast steam directly inside. This is a critical step many ignore. It eliminates the musty odor that sometimes lingers in bathrooms even after a full scrub.
Advanced Techniques for the Shower and Bathtub
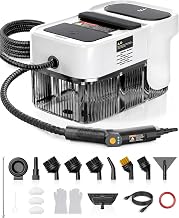
GEVOLCM Steam Cleaner, 3 Level Adjustable Handle with 18 Accessories
Check PriceShower walls are expansive, but you can work efficiently by using a triangular-shaped brush head. The geometry fits perfectly into the corners where walls meet. Apply steam from the top down so the heat rises and pre-warms the tile above, making continuous cleaning much faster. You will notice soap residue simply slides off acrylic or fiberglass inserts without aggressive rubbing.
For textured bathtub bottoms, always use a brush attachment with stiff bristles combined with steam. The bristles agitate the non-slip texture while the steam sanitizes it. Avoid leaving standing pools of water behind by setting the steam level to low moisture if the sludge becomes too soupy. The goal is hot paste consistency that lifts away easily.
Do not forget the shower track. Sliding door tracks are notoriously frustrating, holding standing water and pink biofilm. Press the nozzle directly into the track and move extremely slowly. A single quick pass will only liquefy the surface layer. Let the heat soak the crusted dirt, then wipe it out with a thick wad of paper towels to trap the gunk permanently.
Effortless Toilet Deep Cleaning
The exterior of the toilet, especially the hinge caps and floor bolts, requires steam. Wrap a cloth around the brush head and press firmly against the plastic hinges. Steam condenses into boiling hot water droplets that flow into the crevices, killing urine bacteria that cause terrible odors. The heat sanitizes in a way that a standard tissue wipe simply dreams of doing.
To tackle the toilet bowl rim, use the angled nozzle. Aim the dry steam up under the rim where flush water comes out. A hidden world of mineral deposits and black mold colonies will start chipping away. Follow up with a quick scrub using a toilet brush. This prevents the need for harsh acid-based bowl cleaners in most maintenance cleanings.
Steam is safe around the wax ring area as long as you do not force high pressure directly into the floor gap. Use the large floor brush to sanitize the porcelain base and the tiles surrounding the toilet. If lingering smells have been a problem, steam cleaning the entire base decimates the bacteria responsible, which often survive mopping. You might want to explore best bathroom tile cleaner solutions to pair with your steam routine for maximum freshness.
Dealing with Mold and Mildew Safely
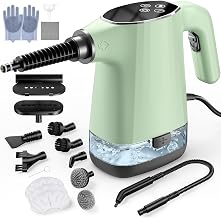
Handheld Steam Cleaner, Portable Steamer for Cleaning with 18PCS Accessories
Check PriceDry steam is a registered sanitizer for a reason. It reduces allergens and kills mold within seconds of contact. However, you must not blow mold spores into the air by waving the nozzle around. Place the brush directly onto the molded area, trapping it beneath the bristles before pulling the trigger. This captures the spores and drives the heat straight into the colony.
For ceilings or high corners, wear protective eyewear. Gravity will cause hot droplets to fall, and you want to avoid getting dirty condensate in your eyes. Work upstream, meaning you should stand on the opposite side of the room from the airflow vent. This pushes the airborne spores away from your face toward an exhaust fan if you have one running.
After steaming moldy surfaces, immediately dispose of the microfiber cloth or wash it in a hot water cycle with bleach. You do not want dormant spores re-contaminating clean surfaces. The final wipe-down is the step that guarantees the mold does not bounce back within a week.
Navigating Floor to Ceiling Cleaning Workflow
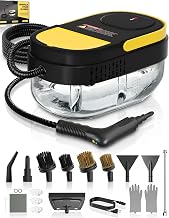
Gautye Steam Cleaner, 3 Level Adjustable Handle with 15 Accessories
Check PriceLogic dictates that you should start at the top of the room, but with steam, adjust this slightly. Begin with the worst spots, usually the shower and toilet, while the boiler is at maximum heat. After those heavy jobs, move to the ceiling vent and light fixtures. Dust mites love bathroom exhaust fans, and steam renders the metal louvers spotless without removing screws.
Mirrors and medicine cabinets come next. The reflective surfaces need a light touch, a quick puff of vapor followed by a razor-sharp microfiber wipe. When you reach the floor, tilt the brush handle low. This direct angle pushes steam into tile micro-textures rather than skipping across the top. Proprioception matters, keep your back straight to avoid fatigue.
Edge along the baseboards meticulously. Humidity and hair settle there, forming a sticky grey line. The edge tool or a putty knife wrapped in a steam cloth pulls this line away without chipping paint. A final dry pass with a terry cloth mop absorbs any remaining humidity, leaving the floors dry and safe to walk on immediately.
Maintaining Your Steam Cleaner for Longevity
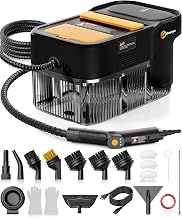
Gautye Steam Cleaner, 3 Level Adjustable Handle with 18 Accessories
Check PriceMineral scale is the enemy of any steam appliance. If you live in a hard water area, do not use tap water religiously. Distilled or demineralized water extends the life of the boiler element infinitely. Tapping a clogged boiler can cause spitting, which sends boiling water droplets onto surfaces, potentially damaging wood veneers. Flushing the boiler with a cleaning solution every few months ensures consistent dry steam.
Never store the cleaner with a wet accessory attached. Moisture breeds bacteria inside the brushes and hoses, creating a foul smell the next time you heat it up. Disassemble attachments and hang them to air dry completely. A well-maintained steam machine is a reliable partner for your steam cleaning bathroom tips routine.
Replace worn brush tips. Flattened bristles do not agitate grout effectively and require you to hold the steam longer, wasting energy. Sharp, stiff brushes break the surface tension of water on soil, letting the heat penetrate faster. Treat your accessories with the same care you would a fine paintbrush set.
Common Mistakes to Avoid
- Over-saturating surfaces: Waiting until water drips down the walls means you are using too much liquid. Back off the moisture control valve and use a thicker towel. Puddles just redistribute dirt rather than eliminating it.
- Skipping the cool-down wipe: Steam leaves surfaces warm. If you walk away without a final buff, airborne particles quickly stick to the warm, slightly damp tile. A cool, dry cloth seals the deal.
- Ignoring personal safety: Never point the steam jet at your skin. Burns happen faster than you expect with pressurized vapor. Wear closed-toe shoes, and if you are balancing on the edge of a tub, ensure you have a non-slip mat underfoot.
Frequently Asked Questions
Can I use steam on painted walls?
You can use steam on semi-gloss or gloss bathroom paints if you keep the nozzle moving quickly. Flat or matte paints absorb moisture too eagerly and may blister. Always test a bottom corner first. The wall should feel just slightly warm, never saturated.
Does steam remove red or pink mold biofilm?
Yes, steam effectively kills Serratia marcescens, the pink bacteria found in shower corners. Since biofilm sticks tightly, you must combine steam with physical wiping. The steam lifts the colony, and the towel removes it. Plain water cannot hold the bacteria once the steam breaks the adhesive bond.
Is steam safe for natural stone like marble?
Exercise extreme caution. Marble is calcium carbonate, and intense heat fluctuations can cause thermal shock, leading to micro-cracks. Use low-pressure steam with a thick barrier pad. However, sealing marble regularly remains the best defense, reducing how often you need to steam it at all. When in doubt, consult the stone fabricator.
Will steam ruin my bathroom mirror backing?
If steam penetrates the edges of the mirror, it can cause silver backing decay, known as mirror rot. Avoid shooting steam directly at the edges. Point the nozzle toward the center and wipe toward the frame. Use a quick blast rather than a soaking session.
Integrating Steam into Your Weekly Routine
The most valuable of all steam cleaning bathroom tips is consistency. Do not wait until the bathroom looks dirty. A weekly five-minute steam session on high-touch points, faucets, handles, and light switches keeps bacteria levels undetectable. This habit reduces the need for deep scrubbing marathons.
If you want to maximize efficiency, deploy steam immediately after a hot shower. The ambient warmth and condensation have already loosened oils, making the steam’s job almost effortless. This is called “cleaning the bloom,” and it eliminates water spots before they bake onto glass. For more tough tile scenarios, you can also check resources like the EPA guide to mold cleanup to understand moisture management better.
Do not limit steam to just the bathroom floor. The toothbrush holder, the bottom of soap dispensers, and the toilet paper holder stem are high-contact fomites. A puff of steam sanitizes these without the acrid smell of disinfectant sprays. Your bathroom will maintain that spa-like, fresh atmosphere naturally.
Transitioning to steam is a win for your family’s wellness, the environment, and your schedule. It turns a hated chore into an oddly satisfying ritual where dirt melts away. Embrace the power of heat, and you will find yourself genuinely looking forward to cleaning day.