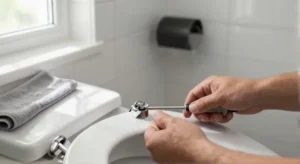
Removing a Bemis toilet seat might seem like a simple task, but the company uses several different attachment systems that can leave you scratching your head. Whether you are upgrading to a new soft-close seat, deep-cleaning a stubborn hinge, or fixing a loose wobble, knowing the exact removal method for your model saves time and prevents broken plastic parts. This guide walks you through the process for top-mount bolts, quick-release hinges, and those confusing hidden tabs. You will also learn how to handle stuck hardware without scratching your porcelain.
Bemis has been a dominant name in toilet seats for decades, supplying both budget-friendly and premium slow-close options. Their engineering means you rarely need special tools, but they do sometimes conceal the fasteners so well that homeowners assume the seat is permanently attached. By the end of this article, you will know exactly how to free even the most stubborn Bemis seat, plus how to prep the bowl for a perfect new installation.
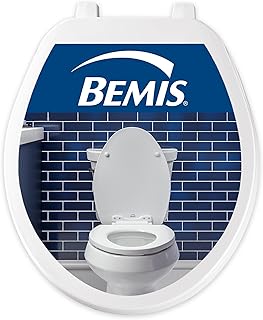
Bemis 70 000 Plastic Round Toilet Seat
Check PriceUnderstanding Bemis Toilet Seat Attachment Systems
Before you grab a screwdriver, it helps to identify what you are working with. Bemis uses three primary attachment styles across their elongated, round, and specialty seats. The method changes slightly depending on whether you have the basic Sta-Tite system, the Easy Clean & Change hinges, or the newer Snap-Off design found on many slow-close models. Spending two minutes identifying your hardware prevents unnecessary force.
Why Removing a Bemis Seat Is Different
Many competitors rely on simple wing nuts you can spin by hand. Bemis often incorporates a plastic housing that covers the bolt heads, making them invisible from above. This design looks sleek and makes cleaning easier once you know the trick, but it can be baffling the first time. The company also favors a top-mount bolt that stays in place while you loosen the nut from underneath, which differs from the nut-and-bolt setups of basic universal seats.
Once you understand that most Bemis seats use a two-part hinge, the removal logic clicks. The bolt passes through the bowl and threads into a wing nut or a captive nut under the deck. On quick-release models, the seat pops off the posts first, giving you clear access to the mounting hardware. On other models, you simply pop open a small cover to reach the screw head.
Tools You Will Need for Bemis Toilet Seat Removal
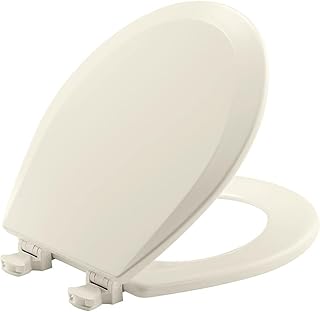
Bemis 500EC Wood Round Biscuit Toilet Seat
Check PriceAlmost every Bemis removal job can be completed with standard household tools. Nothing exotic is required, but using the right size driver prevents stripping soft plastic bolt heads. Gather your supplies before starting so you do not find yourself halfway under the toilet hunting for a flashlight.
- A flathead screwdriver (medium size)
- A Phillips head screwdriver (#2 is most common)
- An adjustable wrench or a pair of pliers
- A flashlight or headlamp
- Penetrating oil (like WD-40 or liquid wrench)
- A small container or rag to catch any drips
Optional Supplies That Make the Job Easier
If your toilet is in a tight corner, a stubby screwdriver can save your knuckles. A handheld mirror helps you see the underside nuts without having to contort your neck. For rusted metal nuts, a deep-well socket set speeds things up considerably. Keep a pair of nitrile gloves nearby if you are sensitive to cleaning chemicals, because you will want to scrub the mounting area before putting on a new seat.
Step-by-Step Removal Instructions for Common Bemis Models
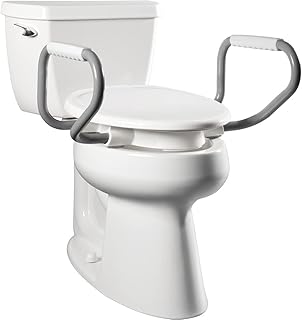
Bemis Assurance Raised Toilet Seat with Handles
Check PriceThe following methods cover about 95 percent of Bemis toilet seats found in homes today. Start with the first method if you see obvious bolt covers on top of the hinges. If you see a small chrome or plastic button near the hinge, jump to the quick-release section. When all else fails, the hidden tab approach will get you unstuck.
Model with Top-Mount Bolts and Access Covers
This is the classic Bemis Sta-Tite system. Look at the back of the seat where the hinges meet the bowl. You will likely see two oval or rectangular plastic caps. These covers snap into place to hide the screw heads. To begin, gently insert a flathead screwdriver under the edge of the cover and twist slightly. The cap should pop up without much effort. Avoid prying too aggressively, because the plastic tabs can snap if they are cold or old.
With the covers off, you will see the tops of the bolts. Many Bemis seats use a combination head that accepts both a flathead and a Phillips driver. Hold the bolt still from the top while you reach underneath the bowl to find the corresponding wing nut or hex nut. If you have a helper, one person can hold the top while the other turns the nut. Otherwise, use one hand on the screwdriver and the other on the wrench. Turn the nut counterclockwise to loosen. Once it is finger-loose, you can often spin it off by hand.
After removing both nuts, lift the seat straight up. The bolts will stay with the seat on most models. If the bolts remain in the bowl, simply pull them out. You now have a bare bowl ready for cleaning or a new seat. For a complete tutorial on the full swap process, review our guide on installing a new toilet seat.
Model with Quick-Release Hinges
Bemis quick-release seats are popular because you can lift them off the base for thorough cleaning. Look for a small button or slider on the inner side of each hinge. On the Easy Clean & Change design, you simply press the button and lift the seat away from the posts. There is no need to touch any nuts or bolts at this stage. The seat will click free and leave two mounting posts attached to the bowl.
With the seat removed, you will see the mounting posts clearly. These posts have a base that covers the bolt holes. Grasp the post base and twist it counterclockwise. Some models require you to press a release tab while twisting. If the post does not turn by hand, check underneath the bowl for a locking nut. Hold the post from the top with one hand and loosen the nut with your wrench. Once the nut is off, the post lifts out. Set all hardware aside in a safe place, as replacement parts can be difficult to match.
Model with Hidden Tabs or Snap-Off Covers
Some high-end Bemis seats, especially the enameled wood models, use a concealed snap-off hinge cover. There is no obvious seam, but the entire hinge cover acts as the cap. To remove it, hold the seat in the upright position and firmly pull the hinge cover straight up. It may help to wiggle slightly while lifting. The cover is usually held by friction and small detents, not adhesive, so it will release cleanly.
Underneath you will find a standard bolt. Use the same top-hold method as before: keep a screwdriver on the bolt head, then go below and turn the wing nut counterclockwise. If the bolt spins freely and the nut does not loosen, the metal insert inside the plastic bolt may have stripped. In that gripping the nut with pliers while pulling upward on the seat can sometimes provide enough friction to break the bond. If that fails, see the stuck hardware section below.
Dealing with Stuck or Rusted Bolts
Bathroom humidity can cause metal nuts to rust solid onto plastic bolts. This is especially common in older homes with poor ventilation. The worst approach is to force the bolt with sheer strength, because you will likely snap the plastic. Instead, apply a penetrating oil to the threads from underneath. Let it sit for 10 minutes. Give the nut a gentle tap with a wrench to help the oil seep in.
After the soak, use a wrench to hold the nut and turn the bolt head from above with your screwdriver. Counterintuitively, sometimes tightening a fraction of a turn first breaks the corrosion seal better than trying to loosen right away. If the nut still will not budge, you can carefully cut it off with a hacksaw blade, but protect the porcelain with a folded rag. For plastic nuts, a pair of pliers can crush the nut sideways until it cracks apart. Replacement hardware kits are inexpensive and readily available.
Common Problems and How to Solve Them
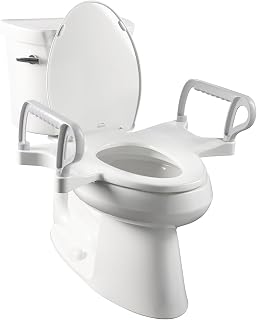
Bemis Assist Toilet Seat with Support Handles
Check PriceEven with the right instructions, a few obstacles can appear. Most of them have straightforward fixes that do not require calling a plumber. Here are the most frequent headaches people encounter with Bemis toilet seat removal.
Plastic Bolts That Will Not Turn
Bemis bolts are often plastic, which means they can strip if you use the wrong size screwdriver. If the head looks mangled, try using a wide rubber band between the screwdriver tip and the screw head. Press firmly and turn slowly. Sometimes a manual impact driver with light taps can seat the bit deeper. If the bolt is completely rounded out, you may need to drill it out with a bit slightly smaller than the bolt shaft. Go slowly and stop once the head pops off, then push the remainder through.
Access Holes Are Covered by the Bowl Design
Some one-piece toilets have very tight clearances under the deck, making it nearly impossible to reach the nuts with fingers or a standard wrench. In these situations, a deep-well socket on a long extension can reach up through the access gap. If even that fails, you can try removing the seat with the bowl still attached by unscrewing only from the top, but this rarely works on Bemis seats because the nut below will just spin. You may need a helper with very slim hands or consider removing the tank for better access. Fortunately, most Bemis seats are installed on standard two-piece toilets with ample under-bowl space.
How to Clean and Prep for a New Installation
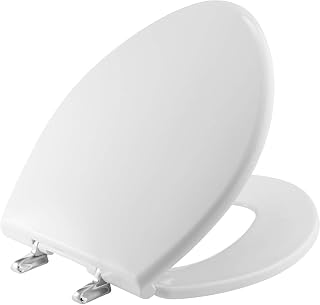
Bemis 1000CPT Paramont Oversized Heavy Duty Seat
Check PriceWith the old seat gone, you have a rare opportunity to deep-clean the often-neglected hinge area. Use a non-abrasive bathroom cleaner and a soft scrub pad to remove built-up grime and mineral deposits around the mounting holes. Pay special attention to the underside of the bowl rim where the old nuts created a shadow. Dry the area completely before attempting to install the new seat.
If you are replacing a seat that wobbled for a long time, inspect the porcelain holes carefully. Hairline cracks radiating from the bolt hole are rare but serious. Should you find any, do not install a new seat until a professional evaluates the integrity of the bowl. For a loose seat that simply needs tightening rather than replacement, check our dedicated guide on fixing a loose toilet seat for permanent tightening tricks.
Frequently Asked Questions About Bemis Toilet Seat Removal
These answers address the most common queries we receive from homeowners who are mid-project and need quick, clear guidance.
Do all Bemis toilet seats have quick-release buttons?
No. Only specific product lines like the Bemis Easy Clean & Change or the Mayfair line feature quick-release hinges. Budget models and some wood core seats use the simpler Sta-Tite bolt and nut system. Check for a small gray or chrome button on the side of the hinge. If you see one, you have quick-release. If not, look for the top access covers.
Can I remove a Bemis toilet seat without any tools?
Most Bemis quick-release seats can be removed completely without tools. You press the button, lift the seat, then twist off the mounting posts by hand. Sta-Tite models, however, require at least a screwdriver and often a wrench for the nut underneath. It is always a good idea to have a basic set of household tools on hand just in case.
How do I find the model number of my Bemis seat?
Flip the seat up and look for a sticker or embossed number on the underside of the seat ring or between the hinges. Bemis usually prints the model and date code there. If the sticker has worn off, you can identify the attachment type visually and match it with the descriptions on the Bemis official support page.
What if the plastic bolt snaps during removal?
A snapped bolt is frustrating but not the end of the world. You can often push the remaining stub down through the hole once the nut is removed. If the nut is still attached, grasp the remaining plastic with vise grips and turn. Replacement bolt and nut kits are sold at any hardware store. Be sure to get a Bemis-compatible kit or a universal top-mount bolt set with the correct diameter.
Why does my Bemis seat keep coming loose even after tightening?
Constant loosening usually means the rubber or plastic washers underneath have degraded, or the bolt nuts were not tightened enough initially. Bemis seats rely on friction between the washers and the porcelain. If the washers are slick from cleaner residue, the assembly will shift over time. Remove the seat, clean the washers and deck surface thoroughly with rubbing alcohol, then reinstall the nuts snugly but not overtight. A dab of threadlocker on the metal threads can also help prevent future loosening.
Conclusion
Taking off a Bemis toilet seat becomes straightforward once you identify your hinge style and approach the hardware with patience. Whether you have the quick-release convenience, a hidden snap cover, or the tried-and-true bolt-and-nut setup, the key is to avoid forcing anything that does not want to move. A little penetrating oil and a gentle hand will get even the crustiest seat freed in under 15 minutes.
Now that you have mastered removal, the world of modern slow-close, easy-clean, and elevated comfort seats opens up. Remember to clean the mounting area thoroughly and inspect for damage before dropping in the new hardware. With the right technique, you can swap out a Bemis seat and completely refresh the look of your bathroom in a single afternoon, no plumber needed.